Expert Home Style – For the Price of a Coffee ($3.90)
Master high-end design secrets (Tuscan, Modern) without the expensive consultants.
🛒 Buy NowWhen it comes to home decor, the ceiling often gets overlooked, yet it holds immense potential for transformation. You may have found yourself daydreaming about a way to elevate your space, and that’s why I created this guide on ceiling painting ideas. These ideas are not just about covering a surface; they are about making a bold statement and adding character to any room. If you’ve been searching for inspiration to turn a mundane ceiling into a work of art, you’re in the right place.
This post is meant for creative homeowners, DIY enthusiasts, and anyone who loves to experiment with design. Whether you’re an experienced artist or just starting out, these ceiling painting ideas will spark your imagination. You’ll discover options that suit various tastes, from modern geometric patterns to whimsical motifs. Get ready to explore artistic ceiling ideas that will not only beautify your home but also give it a unique flair.
By the end of this article, you’ll have 18 stunning ceiling painting ideas that will inspire you to grab that paintbrush. Each idea is designed to make a statement, allowing you to add personality to your living spaces. You’ll find practical tips, step-by-step approaches, and even color suggestions to help you create your own ceiling masterpiece. Let’s dive in and turn your ceiling into the focal point of your home!
Key Takeaways
– Discover 18 unique ceiling painting ideas that range from bold geometric designs to whimsical motifs, perfect for any style.
– Gain insights into how artistic ceiling ideas can transform your space and draw attention upward.
– Explore practical approaches for implementing creative ceiling decor, including materials and techniques.
– Learn how to choose bold ceiling colors that can set the mood of your room and reflect your personality.
– Understand the value of ceiling design inspiration in creating a cohesive look throughout your home.
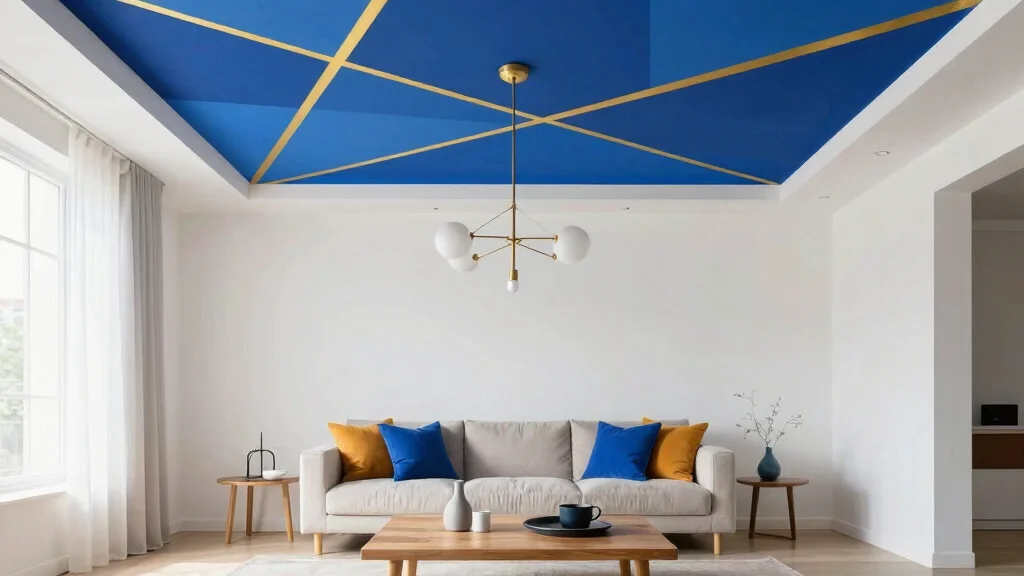
1. Bold Diamond Patterns

Elevate your space with bold diamond patterns on the ceiling. This striking design shines in larger rooms, where it can truly captivate. By combining vibrant turquoise with a soft white, you create a stunning contrast that draws the eye upward, enhancing the feeling of height and openness in your room.
To bring this vision to life, consider these tips: Opt for colors that sync with your overall decor, ensuring a cohesive look. Use painter’s tape to achieve crisp edges and prevent smudges, and think about scaling the diamond sizes according to your room’s dimensions for a balanced appearance.
Consider these practical steps:
– Pair contrasting colors for maximum visual impact.
– Install painter’s tape to outline the diamonds neatly.
– Use larger diamonds in spacious areas and smaller ones in intimate settings.
This design approach transforms your ceiling into a breathtaking focal point, inviting conversation and showcasing your unique style.
2. Concentric Circles

Introduce a sense of movement to your ceiling with concentric circles. This design not only captivates visually but also creates an illusion of depth. Ideal for spaces like nurseries or artistic studios, soft pastels can evoke a calm atmosphere while vibrant hues infuse energy.
To achieve this enchanting look, start by selecting a color scheme that either gradients from light to dark or features contrasting shades for added drama. Use a compass or circular templates for precision, ensuring your circles are even, and layer your paint, starting with the largest circle and gradually working inward.
Implement these ideas:
– Use a gradient of colors for a smooth transition.
– Install circular templates for uniformity.
– Layer paint for a polished finish.
This whimsical design adds charm and becomes a delightful centerpiece in any room, sparking creativity and joy.
Fun fact: ceiling painting ideas using concentric circles can add up to 25% perceived height to a room—great for nurseries or studios. Pro tip: use light-to-dark gradients and circular templates for crisp, professional edges.
3. Geometric Shapes Collage

Why settle for one shape when you can create a collage of geometric forms? This lively design brings an eclectic vibe to your ceiling, combining various shapes like triangles, hexagons, and squares for a dynamic visual experience. By carefully selecting a harmonious color palette, you can craft a modern look that resonates with contemporary aesthetics.
To execute your geometric vision, begin by choosing 3 to 5 complementary colors that work well together. Sketch a layout beforehand to avoid last-minute changes, and don’t hesitate to vary the sizes of each shape for added visual interest.
Follow these tips:
– Choose a vibrant color palette that harmonizes.
– Plan your layout to avoid design chaos.
– Mix different sizes for a playful touch.
This approach not only uplifts the visual appeal but also reflects your artistic personality, making your ceiling a true extension of your style.
🎨 Transform Your Space Like a Pro
Unlock the secrets to stunning home decor with our comprehensive DIY guide, perfect for any style and budget.
4. Starry Night

Transform your ceiling into a magical starry night, perfect for creating a tranquil retreat. This design is especially suitable for bedrooms, where it fosters a serene ambiance. By laying down a deep blue or black base and adding glow-in-the-dark stars and a moon, you can create a captivating and dreamlike environment.
To bring this enchanting vision to life, select a flat finish paint for the background. Utilize stencils or stickers for precision when applying stars and the moon, and play around with their placement, whether scattered randomly or arranged into constellations.
Consider these steps:
– Choose a flat finish for the backdrop.
– Use stencils for clean star patterns.
– Experiment with star placements for creativity.
This artistic ceiling idea not only enhances the room’s charm but also nurtures a cozy and dreamy setting, perfect for winding down after a long day.
5. Ombre Effect

An ombre effect on the ceiling introduces a beautiful gradient that softens the space while maintaining sophistication. This technique seamlessly blends two or more hues, creating an eye-catching transition that elevates the overall atmosphere.
To achieve this stunning effect, select two or three colors in similar shades that flow harmoniously. Use a paint roller to blend the colors effortlessly, and work in sections to ensure a smooth transition, blending each color before it dries.
Here are some implementation tips:
– Choose shades that complement your decor.
– Use a roller for easy blending.
– Work in sections for the best results.
This ombre ceiling trend enhances the ambiance of various rooms, leaving a lasting impression on anyone who enters.
6. Color Blocked Designs
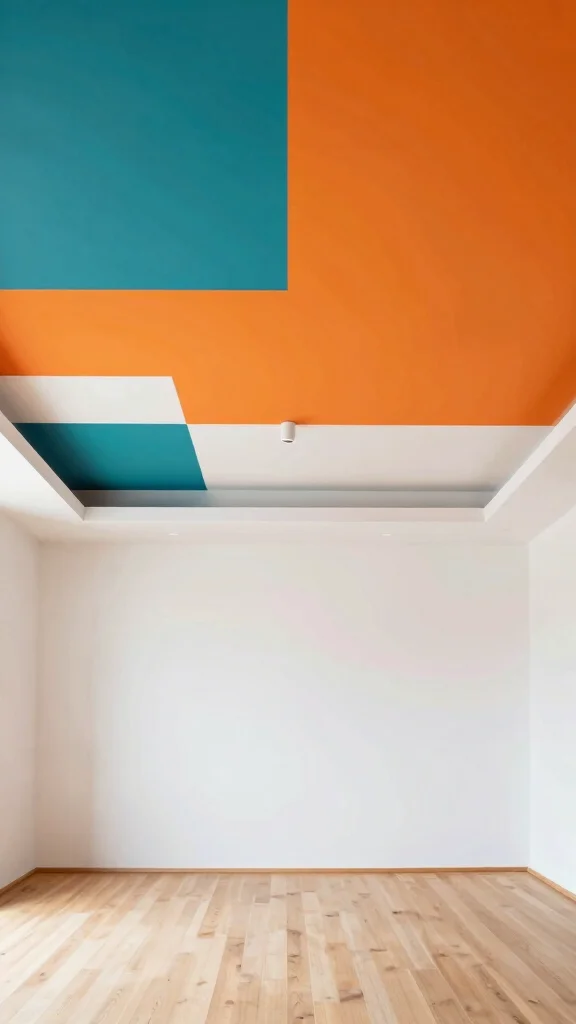
If you favor clean lines and bold aesthetics, color-blocked designs are perfect for you. This style involves painting large blocks of color on the ceiling, resulting in a graphic, modern look that revitalizes any space in your home.
To make this work, choose two or three contrasting colors that create a striking visual impact. Plan your design carefully and use painter’s tape to outline shapes accurately, ensuring you achieve sharp, defined lines. Feel free to experiment with various shapes like rectangles or triangles to reflect your personal style.
Consider these action steps:
– Select bold colors that pop against each other.
– Use painter’s tape for precise lines.
– Experiment with shapes to find your style.
This simple yet impactful idea transforms your ceiling into a work of art, infusing energy and character into your environment.
Difficulty Rating & Requirements
Overall Difficulty Rating: Medium
Painting a ceiling can be a rewarding project, but it does come with its challenges. The overall difficulty is rated as medium because it requires some planning, patience, and a steady hand. This project is suitable for those with a bit of DIY experience or anyone willing to learn and follow instructions closely. If you feel comfortable with basic painting techniques, you’ll likely enjoy this creative endeavor!
Time Estimate:
⏱ Estimated time: 5-8 hours
– Preparation Phase: 1-2 hours for cleaning, taping, and gathering materials.
– Painting Phase: 3-5 hours depending on the complexity of the design.
– Drying Time: Allow at least 1-2 hours between coats and ensure a full day for the paint to cure.
Skill Requirements:
– Required skills: Basic painting techniques, attention to detail, ability to use a ladder safely.
– Beginner-friendly: Yes! While some familiarity with painting helps, even novices can succeed with careful planning and guidance.
– Skills that can be learned include color mixing, measuring for patterns, and using paint tools effectively. However, mastering advanced techniques like geometric patterns may require practice or a more experienced touch.
Tools & Materials Needed:
🧰 Essential items checklist:
– Paint (required): Choose high-quality ceiling paint and any accent colors you want.
– Painter’s Tape (required): For clean lines and protecting edges.
– Drop Cloths (required): To protect your floors and furniture.
– Ladder (required): For reaching higher areas safely.
– Paint Roller (required): For even coverage on large areas.
– Brushes (optional): For detailed work and edges.
– Level (optional): To ensure patterns are straight and even.
– Masking Paper (optional): To cover areas not being painted if your design is intricate.
Step-by-Step Overview:
1. Preparation Phase (1-2 hours): Start by clearing the room of furniture and covering the floor with drop cloths. Clean the ceiling to remove dust and cobwebs. Use painter’s tape to outline any areas you want to keep clean.
2. Design Planning (1 hour): Sketch out your ceiling design on paper or use a computer to visualize your ideas. This will guide your painting and help you measure accurately for patterns.
3. Painting Phase (3-5 hours): Begin with a primer coat if needed, especially if you are making significant color changes. Apply the base coat of paint, followed by detailed patterns or colors as planned. Allow adequate drying time between layers.
4. Final Touches (1 hour): Once the paint is dry, carefully remove painter’s tape. Inspect for any touch-ups needed and make those adjustments. Enjoy your newly transformed ceiling!
Professional vs DIY: Rough cost comparison and when to hire help.
Hiring a professional to paint a ceiling can cost anywhere from $300 to $800, depending on the complexity of the design and the size of the room. DIYing can save you money, often costing only $100 to $200 for materials, but it requires time and effort. If you are not confident in your painting skills or have a very intricate design in mind, it might be worth considering hiring a professional. For simpler designs, tackling the project yourself can be both fulfilling and budget-friendly!
7. Abstract Designs
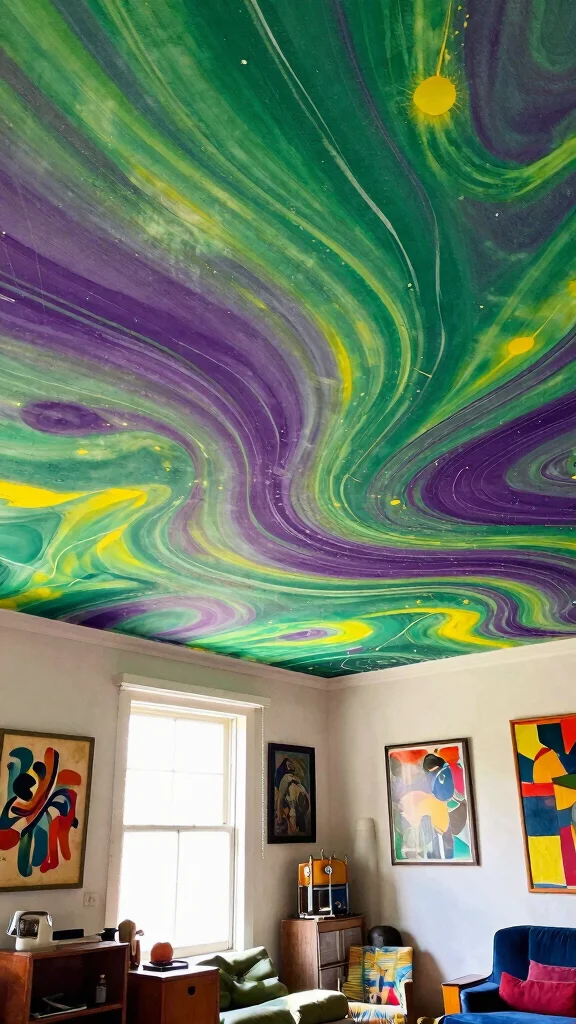
For a more free-spirited approach, abstract designs on your ceiling allow for boundless creativity. This artistic choice can incorporate swirls, splashes, or playful doodles, making it a vibrant addition to your space.
To achieve this unique look, select a color scheme that complements your room’s decor. Let your creativity flow by using brushes, sponges, or even your hands for a more personal touch, and layer colors to create textured depth in your design.
Implement these ideas:
– Choose colors that blend with your room’s style.
– Let your creativity shine through various painting tools.
– Layer colors for added depth and texture.
This abstract ceiling design adds a lively and engaging element to your room, inspiring imagination and joy.
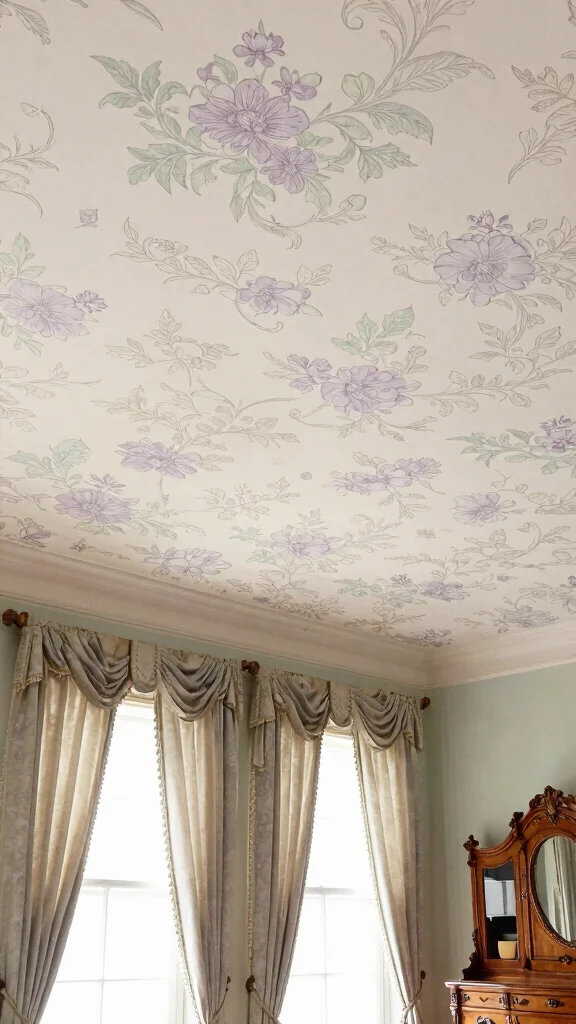
8. Floral Motifs
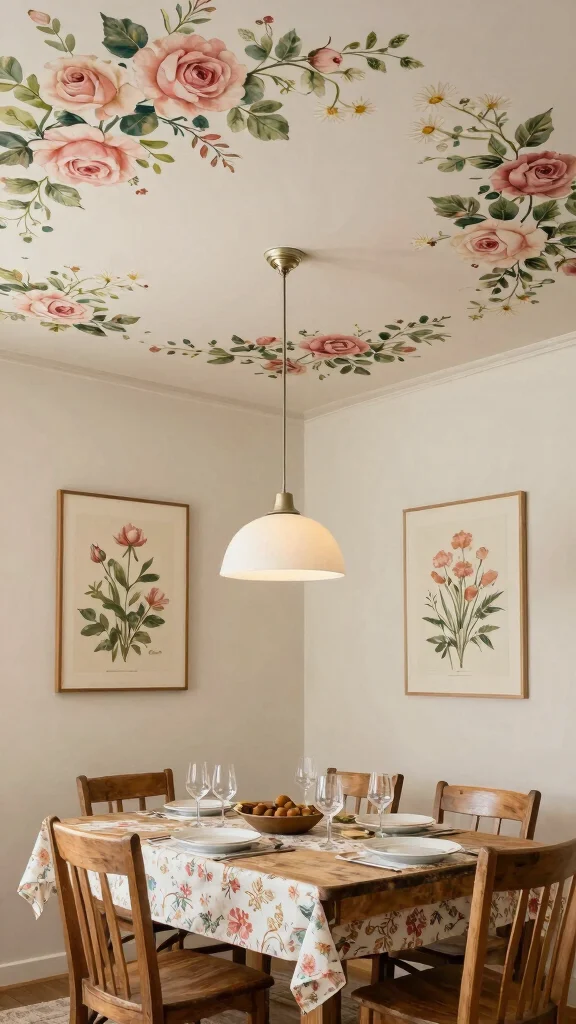
Infuse your space with nature by incorporating floral motifs on the ceiling. This design evokes feelings of calm and cheerfulness, making it perfect for dining areas or living rooms. You can opt for delicate hand-painted flowers or use stencils for a simpler application.
To create this nature-inspired look, select flowers that resonate with your personal style or reflect the season. Soft pastel tones offer a gentle touch, while bold colors can make a striking statement. If hand-painting isn’t your forte, floral stencils will help you achieve perfect shapes effortlessly.
Follow these practical suggestions:
– Choose blooms that inspire your decor.
– Select colors that align with your theme.
– Use stencils for easy and precise designs.
Floral designs on the ceiling can create an inviting atmosphere, reminiscent of spring blooms all year round.
❝ Floral ceiling painting ideas bring calm and cheer to any room. Start with soft pastels for a gentle vibe, or bold colors for a striking statement—hand-paint the petals or use stencils for quick elegance. Your dining area will feel refreshed and inviting.
You might also like
9. Checkerboard Design

For a playful yet classic aesthetic, a checkerboard design can add a fun twist to your ceiling. This timeless pattern is visually striking and enhances balance within the space, making it an appealing choice for various rooms.
To achieve this look, select contrasting colors—traditional black and white work well, but feel free to experiment with vibrant shades. Precise measurements are crucial to ensure uniform squares, and using painter’s tape will help outline each section for a flawless finish.
Implement these steps:
– Choose vibrant colors for a modern take.
– Measure accurately to maintain uniformity.
– Tape edges for a polished look.
This design is especially popular in kitchens and dining areas, adding a whimsical yet refined touch that draws attention.
10. Striped Patterns
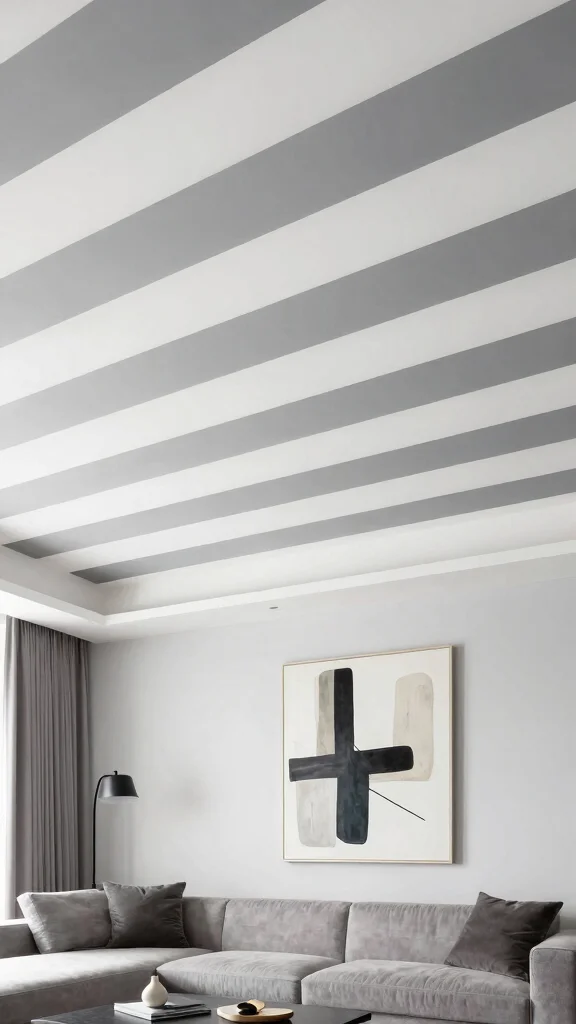
If you prefer a straightforward aesthetic, consider striped patterns for your ceiling. Vertical or horizontal stripes can create the illusion of height or width, depending on your application method, enhancing the perception of space.
To get started, decide on your stripe width—thin stripes can lend a modern feel, while thick stripes make a bold statement. Choose complementary colors that align with your room’s theme, and ensure clean lines by taping off areas meticulously.
Consider these tips:
– Determine your stripe width for desired impact.
– Select colors that harmonize with your decor.
– Tape carefully for crisp, clean lines.
Striped ceilings add depth and dimension, making your room feel larger and more inviting based on your design choices.
11. Whimsical Shapes
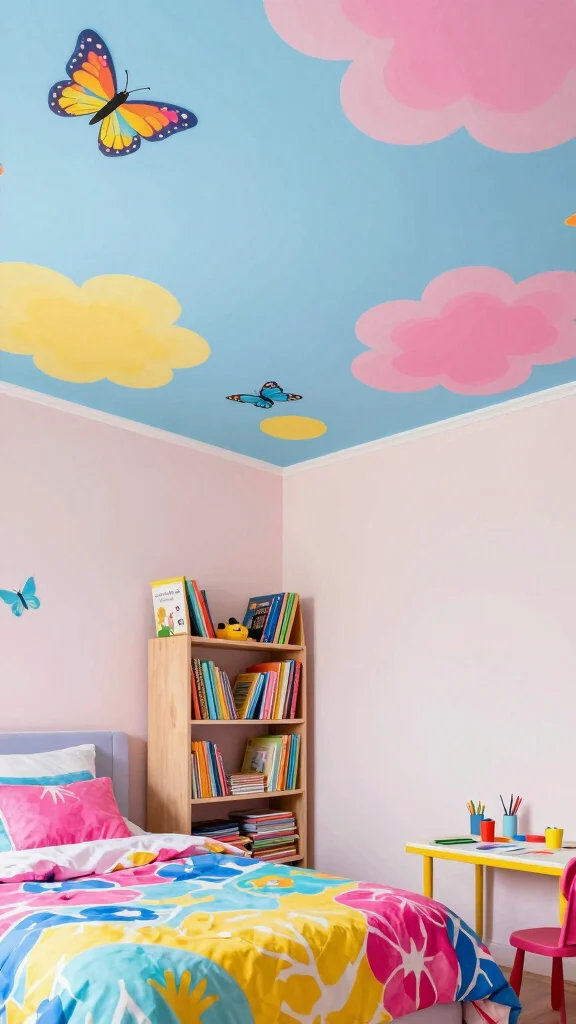
For a child’s room or any playful space, whimsical shapes like clouds, butterflies, or stars can create a joyful atmosphere. These designs inspire creativity and transform an ordinary ceiling into a delightful wonderland.
To bring these playful elements to life, select shapes that resonate with the purpose of the room. Opt for bright, vibrant colors to keep the design lively, and consider using stencils for precision or free-hand painting for a personal touch.
Try these steps:
– Choose shapes that inspire joy and imagination.
– Use bright colors to maintain a fun vibe.
– Consider stencils for consistent designs.
These whimsical elements can spark creativity, making any room feel vibrant and alive.
12. Nature-Inspired Scenes
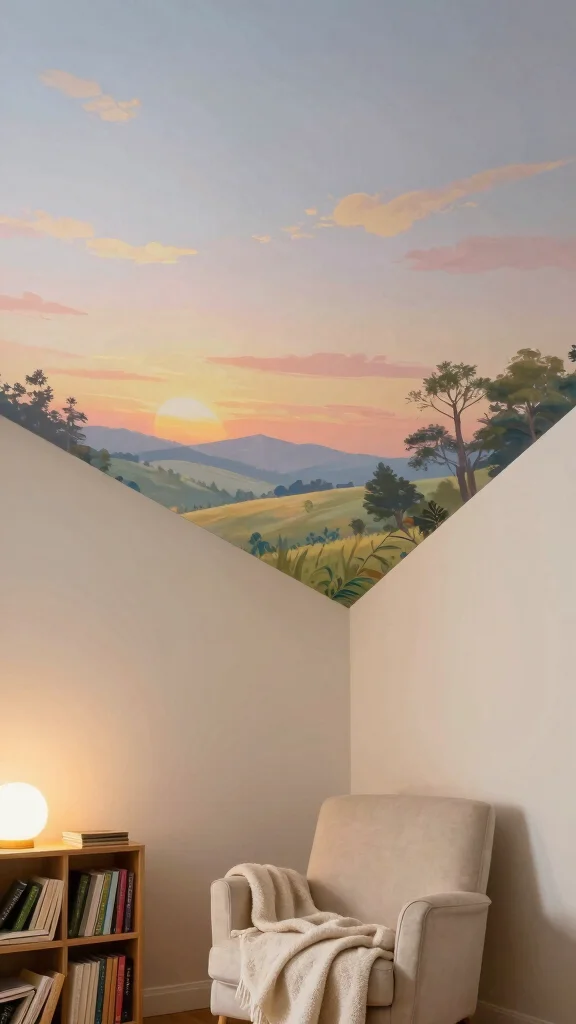
Bring the beauty of the outdoors inside with nature-inspired scenes painted on your ceiling. Whether depicting mountains, forests, or beaches, this design creates a serene environment perfect for relaxation.
To execute this artistic vision, choose a scene that resonates with your favorite outdoor memories. Layer colors carefully to create depth in your landscapes, and include details like birds or trees to add life to your design.
Consider these suggestions:
– Select a scene that inspires tranquility.
– Layer colors for depth and realism.
– Add details for an engaging touch.
This ceiling concept fosters a peaceful atmosphere, allowing you to escape into nature without leaving your home.
13. Vintage Patterns
Embrace nostalgia with vintage patterns that evoke classic decor styles. From floral designs to damask and art deco, these patterns can add elegance and charm to any room.
To achieve this vintage look, choose classic patterns available through wallpapers or stencils that capture the essence of the era. Soft, muted colors enhance the vintage feel, while smaller patterns work best in compact spaces to avoid overwhelming them.
Implement these ideas:
– Select a vintage pattern that resonates with you.
– Use muted colors for an authentic feel.
– Consider smaller patterns for cozy areas.
This vintage-inspired ceiling design creates an enchanting atmosphere, perfect for spaces where you desire a touch of history and charm.
14. Industrial Chiaroscuro

Chiaroscuro, the art of balancing light and dark, is perfect for industrial-themed rooms. By painting one half of the ceiling dark and the other half light, you can create a dramatic contrast that adds depth and interest.
To bring this design to life, select deep grays or blacks contrasted with bright whites or light pastels. Use a level to ensure a straight dividing line between the two tones, and consider adding textures for an extra layer of intrigue.
Consider these steps:
– Choose contrasting colors for bold impact.
– Use a level for precision in your design.
– Experiment with textures to elevate the look.
This ceiling design serves as a striking statement, ideal for modern industrial spaces or contemporary settings that crave a stylish edge.
You Might Also Like
15. Mosaic Art

Transform your ceiling into a stunning mosaic art piece that showcases creativity. This technique can incorporate colorful tiles or painted sections to form beautiful patterns or images that catch the eye.
To create your mosaic, start with a solid base color to help your design stand out. Select tiles or colors that complement each other, and plan your layout to ensure a cohesive and visually pleasing arrangement.
Follow these steps:
– Choose a base color that enhances your mosaic.
– Select tiles or colors for a unified design.
– Plan your layout for a polished finish.
This unique ceiling design highlights artistic craftsmanship, making your space feel truly special.
16. Gradient Waves
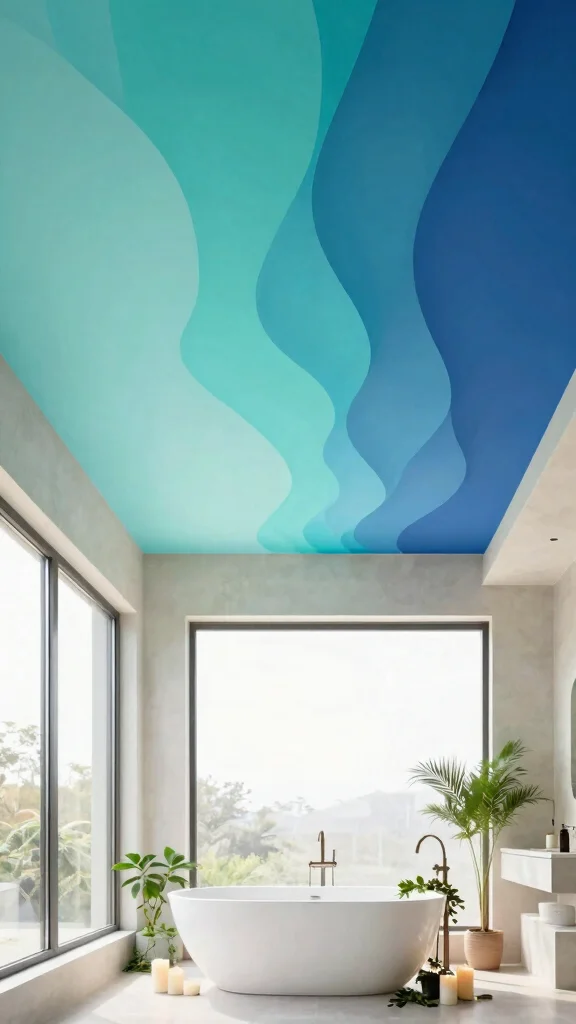
Gradient waves painted on the ceiling create a calming and ethereal atmosphere. This design mimics the gentle flow of water, providing a tranquil vibe especially suited for relaxation spaces like bedrooms or bathrooms.
To craft this serene look, select soothing shades that transition smoothly. Blend the colors using a sponge or brush to ensure an even gradient, and lightly sketch wave patterns to maintain continuity throughout your design.
Consider these steps:
– Choose calming colors for a peaceful effect.
– Blend colors well for a seamless gradient.
– Sketch wave patterns for consistency.
This harmonious design helps create a peaceful retreat in your home, reminiscent of the soothing flow of water.
17. Artistic Murals
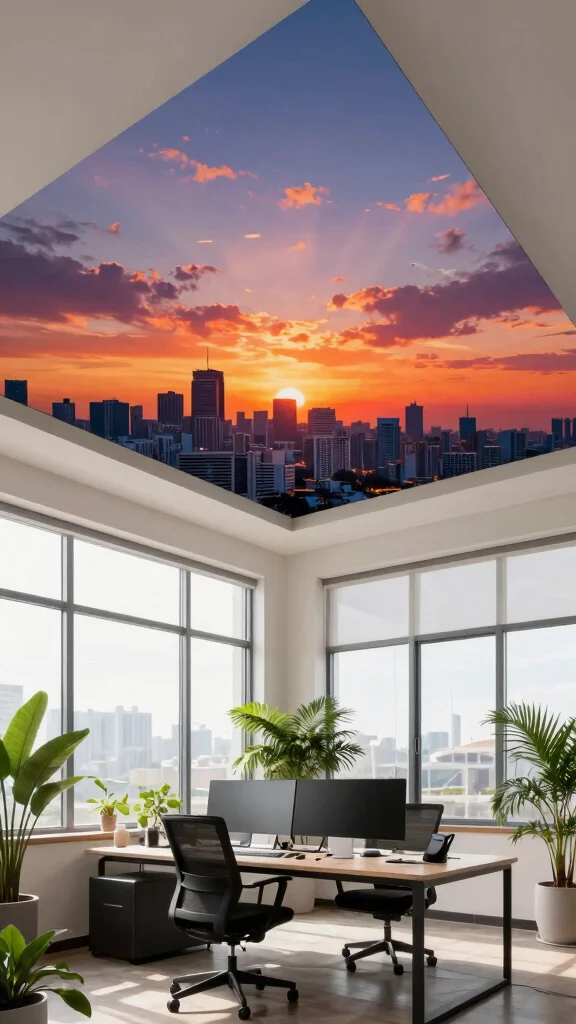
Artistic murals on the ceiling can transform it into a breathtaking focal point. Whether you choose to paint a beautiful landscape, a vibrant cityscape, or abstract art, these murals tell a story and express your personality.
To bring this idea to life, start by selecting a theme that reflects your interests or resonates with you. Sketch your mural on paper before committing to the ceiling to ensure a well-thought-out design. Take your time and enjoy the process, as painting a mural is a creative project that deserves careful attention.
Implement these suggestions:
– Choose a theme that resonates with you.
– Sketch your design before painting.
– Take your time to ensure quality.
This ceiling trend allows for personal expression, turning your ceiling into a stunning reflection of your unique style.
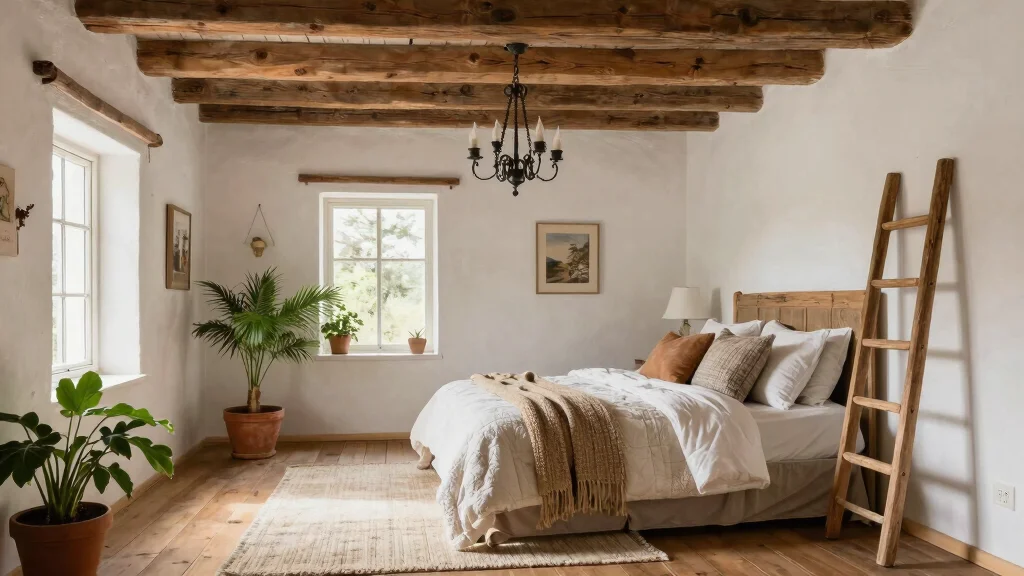
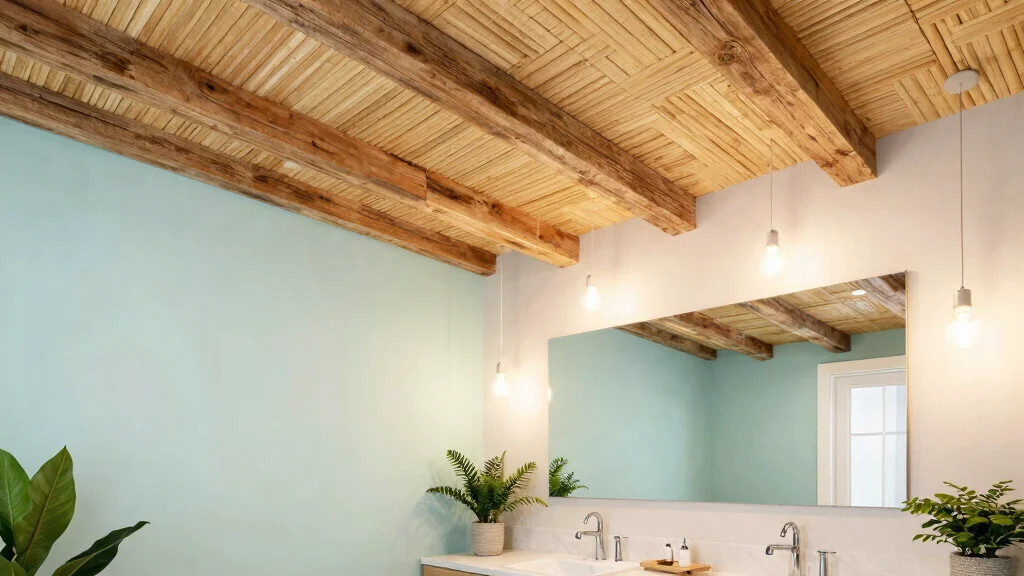
18. Layered Textures

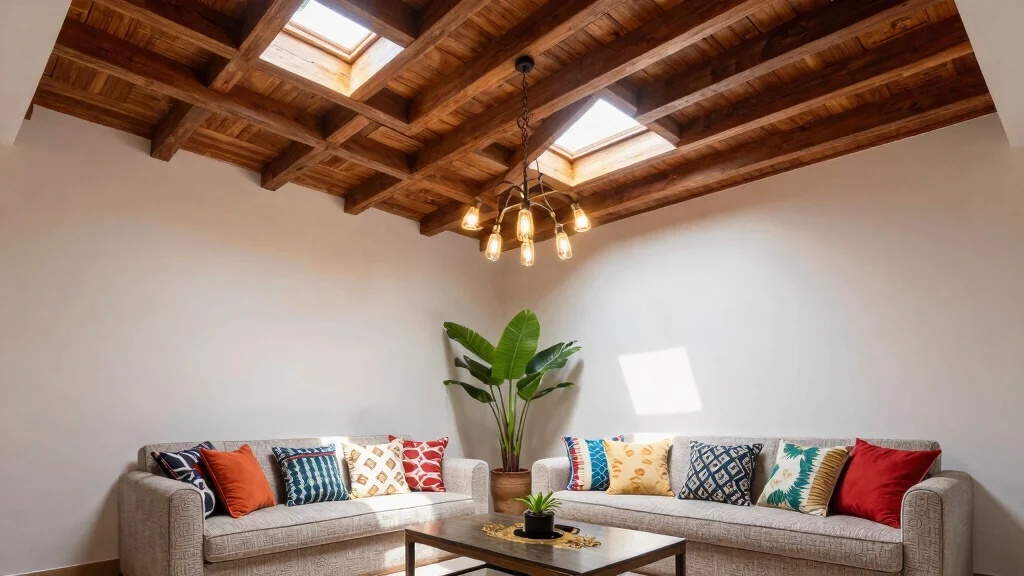
For a unique ceiling design, consider incorporating layered textures. Combining materials such as wood, fabric, or paint can create a visually captivating design that emphasizes both sophistication and style.
To implement this idea, choose materials that add depth and visual interest, like reclaimed wood panels or soft fabric draping. Plan your layout to ensure a cohesive blend of textures, and consider how lighting can enhance these textures, casting shadows that add drama to your space.
Here are some tips:
– Choose materials that complement your decor.
– Plan your layout for a seamless blend.
– Use lighting strategically to highlight textures.
This approach elevates your home’s elegance, making every glance at the ceiling a delightful experience.
Layered textures on the ceiling turn a plain room into a chic conversation piece. Start with wood panels or soft fabric drapes, then play with lighting to make shadows sing. It’s the practical move that elevates any ceiling painting ideas into cinematic drama.
Conclusion

Ceiling painting can be a game changer in your home decor, offering a way to express personality and style in unexpected ways. Whether you choose bold geometric designs or delicate floral motifs, these artistic ceiling ideas can completely redefine a space. Don’t hesitate to explore these options and create a ceiling that truly makes a statement!
Embrace your creativity, and let your ceiling become the highlight of your room.
Frequently Asked Questions
What are some ceiling painting ideas that instantly elevate a room?
From bold geometric shapes to soft tonal murals, there are many ceiling painting ideas that can transform a space. Start by defining your room style and the mood you want, such as dramatic, playful, or serene. For ceilings, lighter bases with a bold accent color can make the room feel larger, while high contrast bold ceiling colors create a striking focal point. Plan your pattern on paper first, then sketch it on the ceiling with chalk. Use painters tape and a laser level for precise lines, prime the surface, and apply two thin coats of paint. Finally, test the design in a small area and observe how lighting changes the effect during the day and at night. If this feels intimidating, begin with a simple border or a single central motif to build confidence.
How can I use geometric ceiling ideas without making the room feel busy?
Geometric ceiling ideas can wow a room, but scale and balance are everything. Start with a calm base color and use one dominant shape, then add a couple of smaller accents so the ceiling reads as art without overwhelming the space. Consider how natural and artificial light will interact with the geometry; light can transform matte into dramatic. Use spacing and negative space to breathe; a single large diamond or hexagon pattern at the center can anchor the look. For busy spaces, pair bold ceiling motifs with restrained furnishings and soft wall colors, and let crisp lighting fixtures highlight the design. With careful planning, you will achieve geometric ceiling ideas that feel intentional and stylish rather than chaotic.
What tools and techniques help achieve clean lines in creative ceiling decor?
Clean lines are the hallmark of creative ceiling decor. Start with a high quality laser level, straightedge, and painter tape. Use stencils for repeat patterns and a sharp angled brush for precise edges. Prime thoroughly, apply two thin coats, and let each coat dry fully before removing tape to prevent peeling. If you are painting a dark line on a light ceiling, use multiple thin passes rather than a single heavy stroke. Score the tape edge with a blade before painting to avoid seepage. Practice on scrap first, then apply to the ceiling. Finish with a washable top coat if you expect cleaning or contact with moisture.
How durable are bold ceiling colors, and what finishes work best for unique ceiling art?
Bold ceiling colors can stay vibrant for years when you choose the right finish and preparation. Use a premium interior acrylic latex paint with good washability. Matte finishes hide imperfections and give a soft look, while satin or semi gloss add a subtle sheen and are easier to wipe clean. For bathrooms or kitchens, opt for moisture resistant formulations and consider a light top coat to protect the design. Before painting, repair cracks and apply a stain blocking primer so colors stay true. Finally, test the color in the room lighting and be prepared for a final touch up after installation.
Is DIY feasible for ceiling painting ideas, or should I hire a professional for artistic ceiling ideas?
DIY can be a fantastic option for simple ceiling painting ideas, especially with a single color or a straightforward border. For complex or multi color geometric patterns, high ceilings, or rooms with challenging lighting, hiring a professional can save time and ensure a precise result. If you go the DIY route, clear the room, cover floors, and protect fixtures; use a sturdy ladder or scaffolding and work in daylight or well lit sessions. Practice your pattern on cardboard first, measure carefully, and tape edges carefully. Request a detailed quote and examples of previous artistic ceiling ideas to make sure you are comfortable with the plan.
Related Topics
ceiling painting ideas
home decor
geometric designs
artistic ceilings
creative ceiling decor
bold ceiling colors
unique ceiling art
interior trends
DIY home projects
easy painting techniques
modern ceiling styles
statement ceilings